Where have you (bracelet) been all these years!!! I can’t believe that I never used bracelet as an accessory until this year. Please don’t judge me~~ I think the reason that I haven’t considered bracelet as an accessory is because I used to play piano and dangling bracelets are sort of distracting. Now that I don’t really play piano anymore, it’s time to bring on the bracelets! Cling cling!!
 I have to thank my sister for the inspiration to wear bracelet again. For her baby shower, we wanted to have a little crafting activity for all of her bff’s and what better idea than to make “friendship” bracelets to celebrate their friendship! But rather than the traditional braided bracelets which are quite challenging to learn in the amount of time we had, I put on my thinking hat and came up with this one of a kind gold bead bracelet that is super simple and looks amazing!
 It takes about half an hour from beginning to end to make one bracelet. The hardest part is gathering the right parts and pieces. In the “jewelry world”, there is a whole set of jargon like findings, spacers, crimps etc. that you have to learn first. It took me hours to master the jewelry lingo before I was ready to shop online for each component for this project.
For this bracelet tutorial, I am using waxed cotton turquoise cord with gold beads. You can also switch it up with different cord materials like leather and hemp and metals like silver and antique gold.
Here’s what you will need:
Bracelet basics:
- 1mm Waxed Cord Turquoise
- 3.5mm Gold Barrel Cord Ends With Lobster Clasp and Extension Chain
- E6000 Craft Adhesive
- Scissors
- Measuring Tape
Beads:
Style 1 (with stars)
Style 2 (assorted round beads)
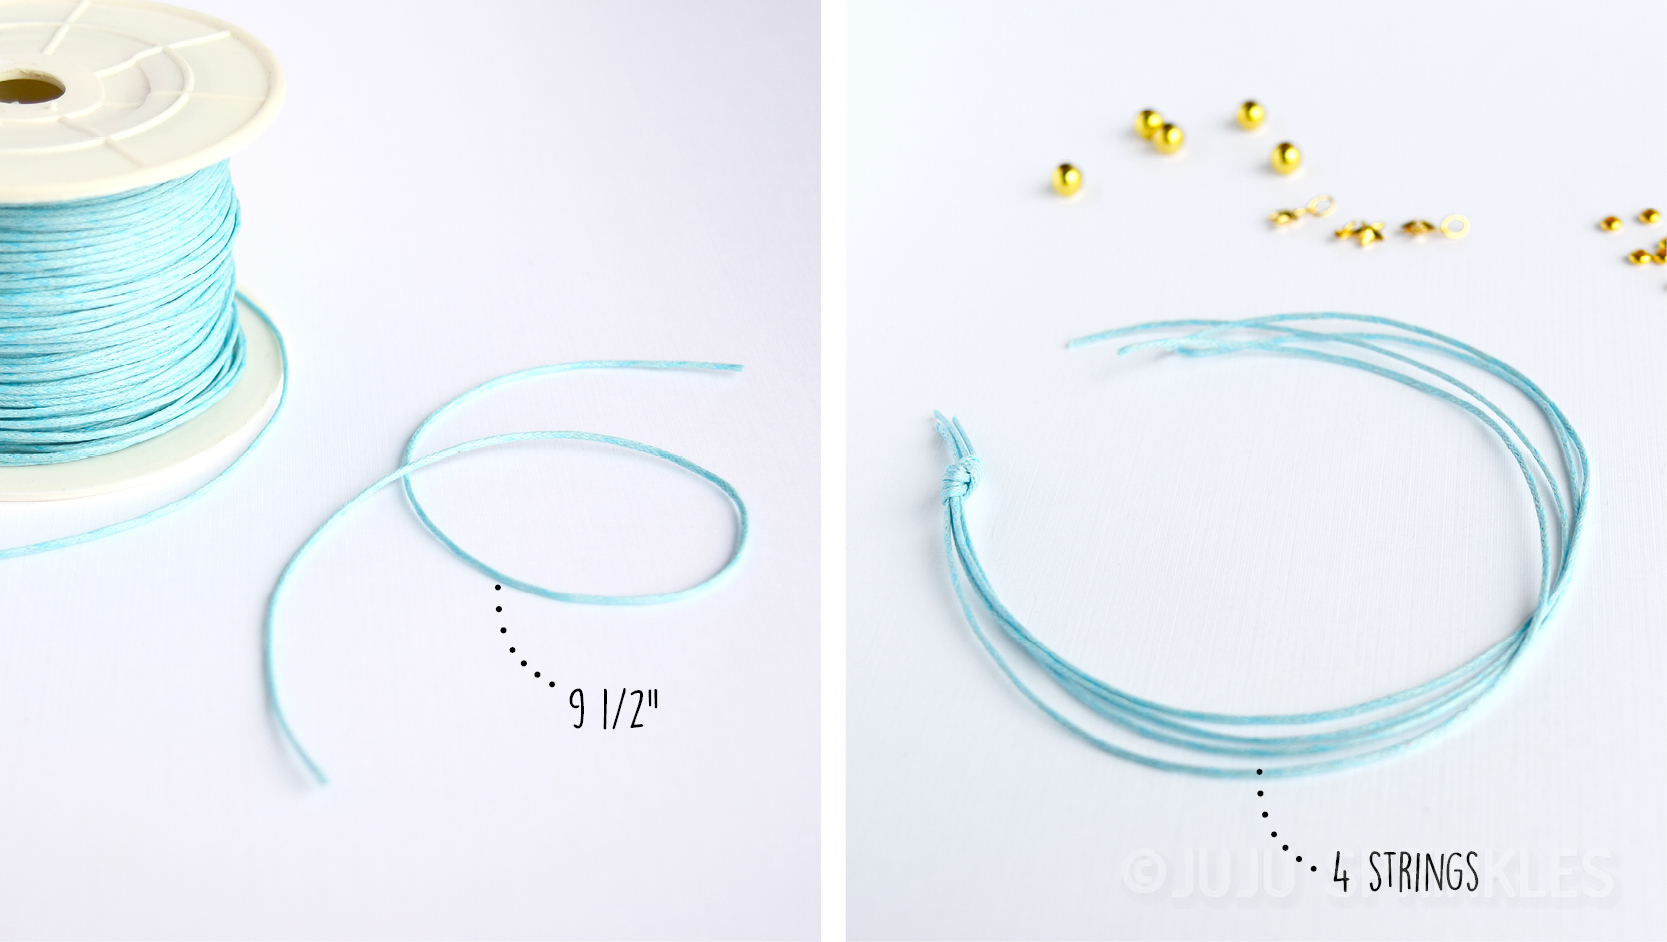
1. Cut 4 strings of 9 1/2″ (24cm) and tie one end of the strings.

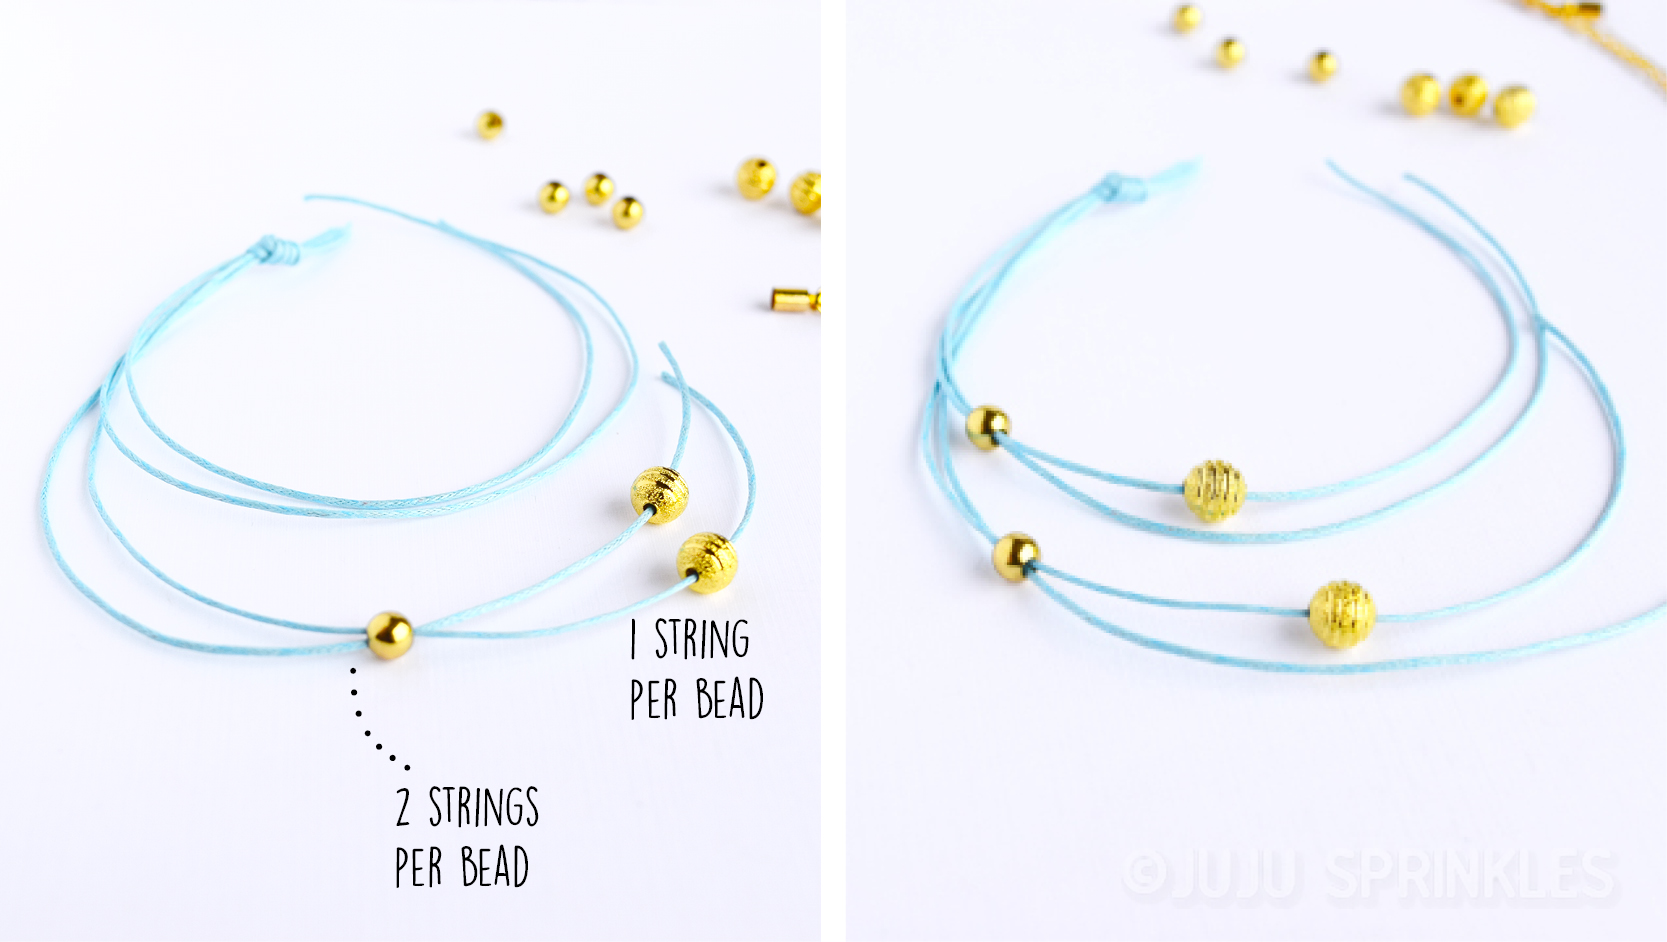
2. String the beads. The round beads have bigger holes so you can string 2 strings per bead or 1 string, it’s completely up to you. 
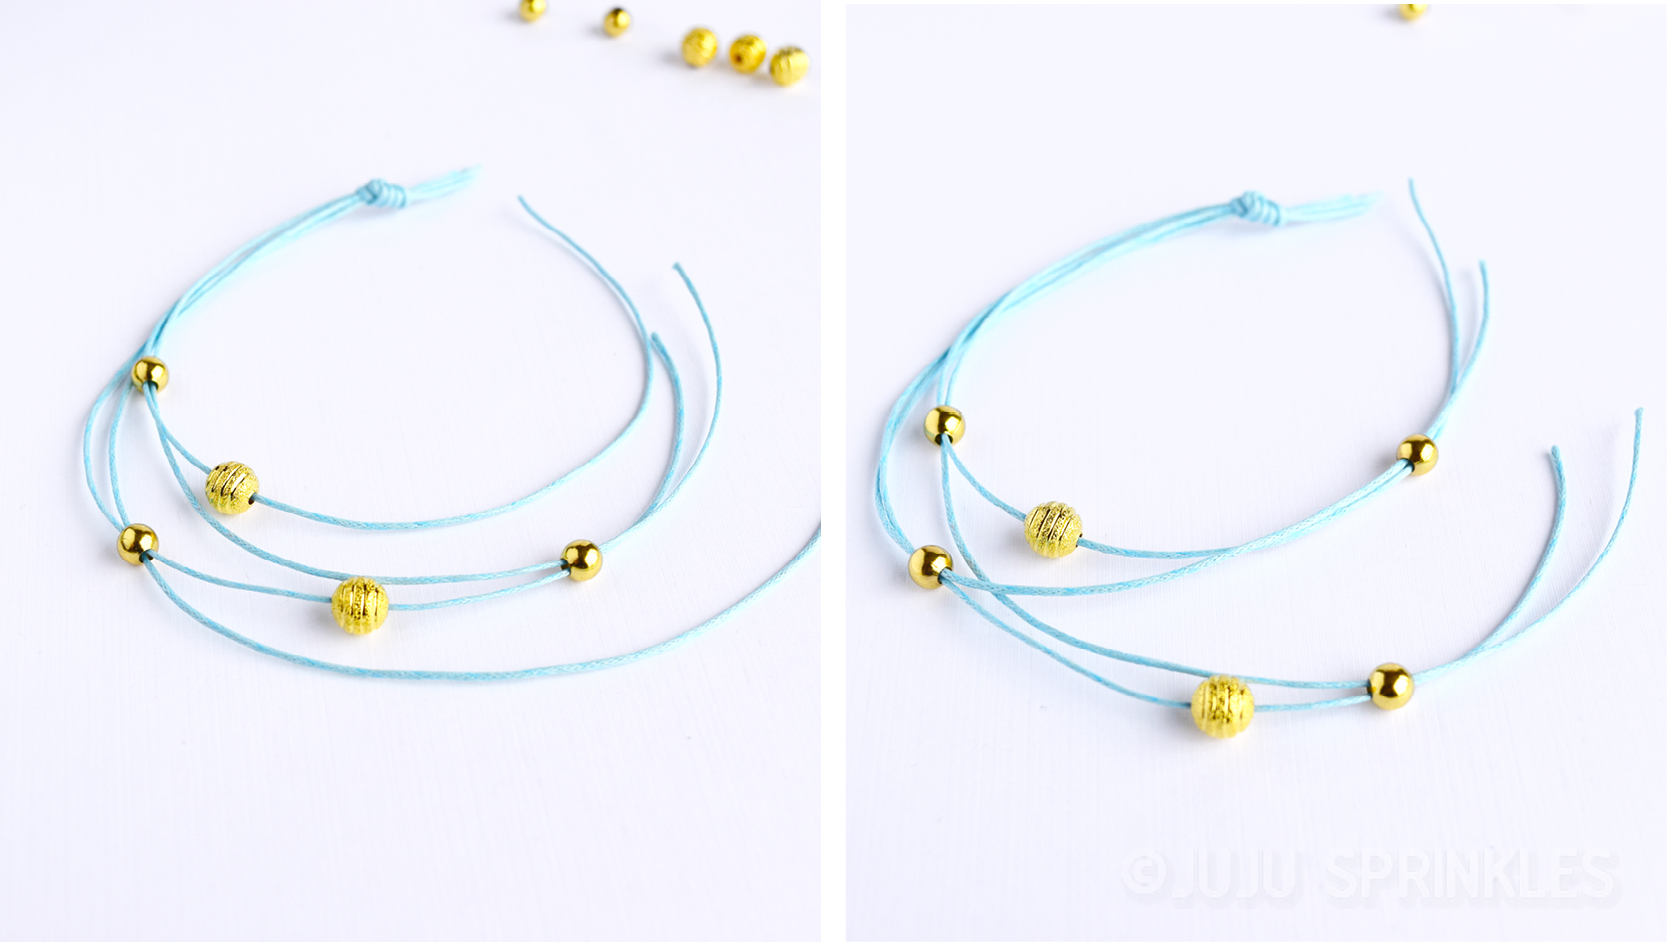
3. Alternate stardust beads and round beads.
4. Tie the end knot. The length from knot to knot should be around 6″ depending on how loose you want your bracelet to be. You can use tape measure to measure your wrist and decide the length accordingly. Trim the ends and insert the ends into glue filled cord caps. 5. Let the glue cure for 24 hours before you wear your bracelet.
6. If you are making the star bracelet, you will need 3 strings. Just string your beads however you want.
Pretty simple right? Now I can add these bracelets to my DIY jewelery organizer that I made awhile back.
You can pick any color for the cords and any metal for the beads. I picked turquoise because it was for a baby shower for a boy. Next time I would like to try lavender or white cords. Maybe even invite a few friends over for a crafting party!
Join my Sprinkles Letters for exclusive offers and more inspirations!
![]()


